Lab S03 — Splunk and OSquery
Install OSquery on Windows 10 and Ubuntu 22.04 using Palantir's configuration, then forward logs to Splunk Enterprise.
Download Lab DocumentPrerequisites
Complete Lab S00 before starting this lab. You will need a working Splunk Enterprise instance and a Universal Forwarder already configured.
This lab requires an Ubuntu 22.04 VM and a Windows 10 VM. Both were tested in Synology VMM.
Introduction
Osquery is an open-source tool that exposes an operating system as a relational database, letting you query it with SQL-like commands. Created by Mike Arpaia at Facebook in 2014. Cross-platform: macOS, Linux, FreeBSD, and Windows.
- How it works: Uses SQL queries to inspect real-time OS state.
- What it can do: Query running processes, user logins, and network connections.
- How it's useful: Simplifies security and administration tasks across platforms.
- Who created it: Mike Arpaia at Facebook, 2014.
Chocolatey is a command-line package manager for Windows, similar to apt-get. Created by Rob Reynolds in 2011. Open-source. Automates the download, install, update, and uninstall of Windows software.
Chocolatey & OSquery Install (Windows 10)
Open an administrative PowerShell session. To verify you are running as Administrator, run the following:
The command returns True if the session is elevated.
Install Chocolatey by visiting chocolatey.org/install and running the command provided on that page. It sets the ExecutionPolicy to Bypass for the install. After install, verify with:

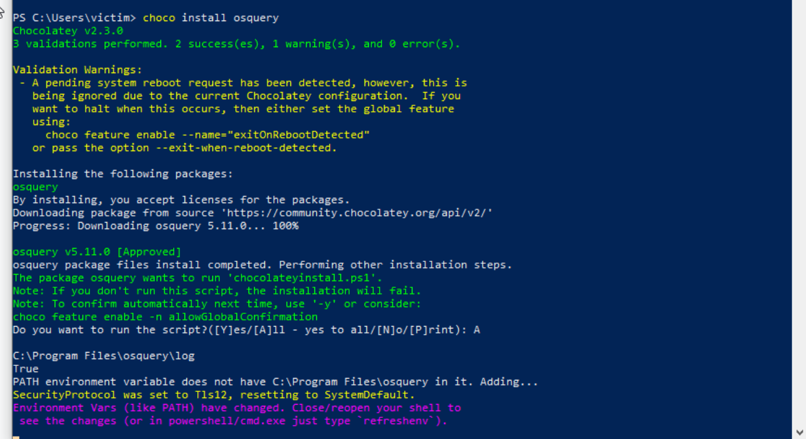
Install OSquery using Chocolatey:
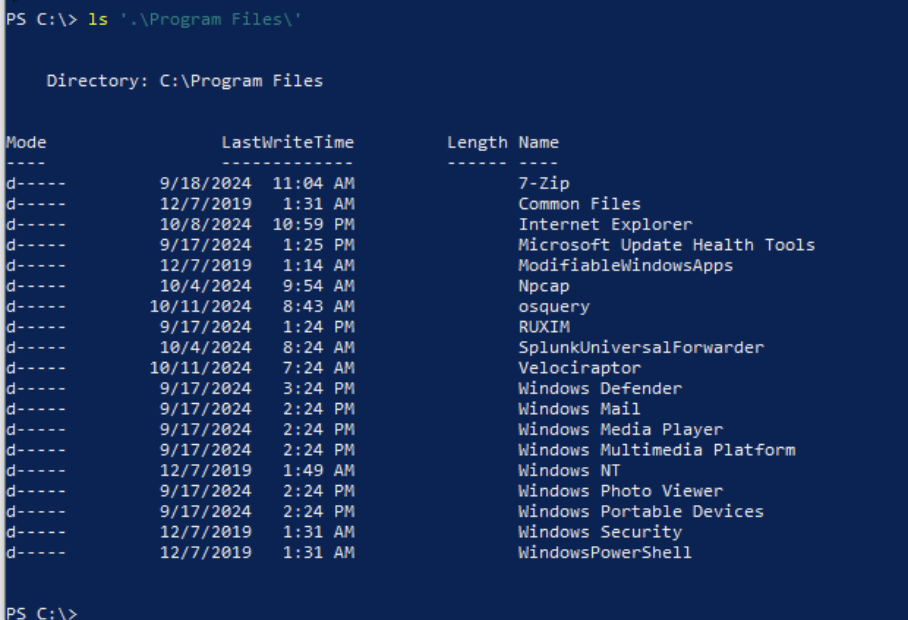
Confirm the installation in C:\Program Files\osquery.
From C:\Program Files\osquery, install the OSquery service and start it:
OSquery Configuration — Palantir Technologies (Windows)
Palantir Technologies published an open-source OSquery configuration for enterprise use.
- Blog post: osquery-across-the-enterprise
- Repository: github.com/palantir/osquery-configuration
Download the Palantir repository and copy the configuration files. From the Classic/Endpoints folder in an administrative PowerShell, run:
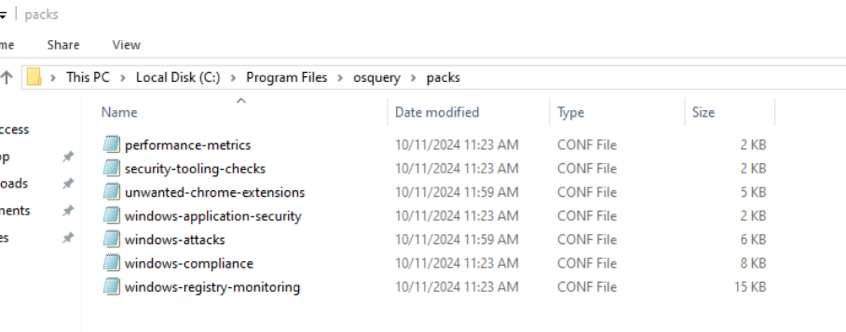
Then from the parent directory, copy the packs folder:
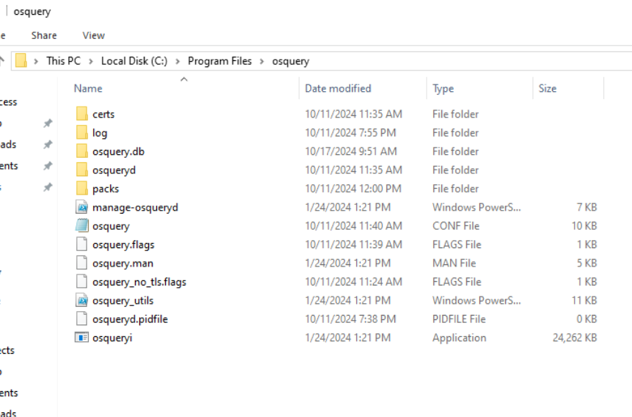
The resulting file structure should include osquery.conf, osquery.flags, and osquery_no_tls.flags in C:\Program Files\osquery, along with a packs\ folder containing seven .conf files.

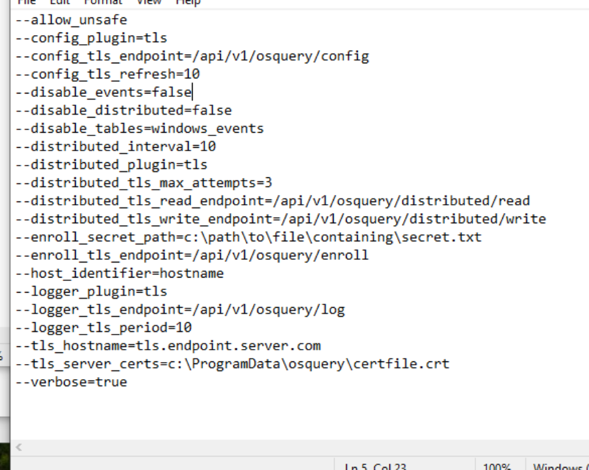
Enable Windows Event Logging by opening osquery.flags as Administrator in Notepad and changing the disable_events flag value to false.

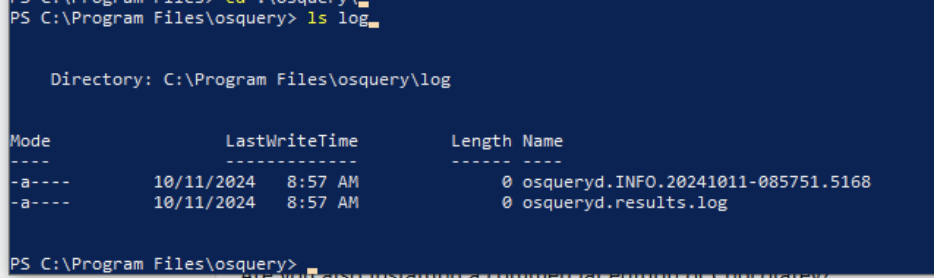
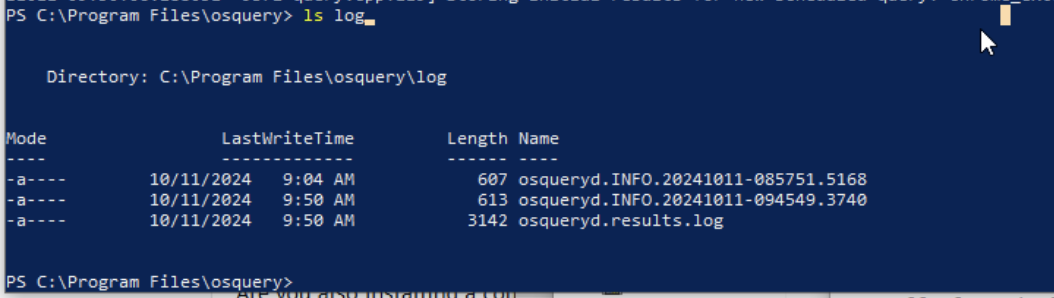
Restart the OSquery service and confirm that results are accumulating in osqueryd.results.log:
OSquery on Linux (Ubuntu 22.04)
Download the latest .deb package from osquery.io/downloads/official (Debian/amd64). At time of writing, the current version is v5.13.1. Install it with:
Test the interactive shell:
Use the default example configuration as a starting point and start the OSquery daemon:
Confirm logs are generating in /var/log/osquery.
Apply the Palantir Linux configuration from github.com/palantir/osquery-configuration. Remove the default config and create a new one:
Populate the file with the raw Palantir config from:
Alternatively, copy from the cloned repository:
Splunk Add-on for OSquery
The TA-osquery is archived on Splunkbase but still available at splunkbase.splunk.com/app/4402. Log in and download the .tgz file.
In the Splunk Web UI go to . Select the .tgz and restart the server. Confirm the app appears in $SPLUNK_HOME/etc/apps/.
Create a new index called osquery in the Splunk Web UI under .
Edit inputs.conf in the TA-osquery defaults to point to the correct log paths and index. Add or update the following entries:
Restart Splunk and confirm data is arriving from the Linux server.
Deploy OSquery Add-on to Windows Forwarder
Copy TA-osquery to the deployment-apps folder so the Deployment Server can push it to your Windows forwarder:
Create a Server Class under . Add TA-osquery as an app and add your Windows 10 client as a client machine.
On Windows, once the app is deployed, open the inputs.conf from the deployed app at C:\Program Files\SplunkUniversalForwarder\etc\apps\TA-osquery\default\inputs.conf in Notepad as Administrator.
Create a local copy at TA-osquery\local\inputs.conf with the correct Windows log path. The local folder takes precedence over default in Splunk's configuration layering.

Verify OSquery data from Windows is arriving in Splunk using the following searches in :
To filter for running services specifically:
